This article strives to be the ultimate design guide on modifying your spherical lens to produce the type of anamorphic boke you can see in the movies. And because I’m not a lens scientist, I’ll try to have an easy-to-understand approach so everyone can learn from my experience. This mod is usually referred to as “anamorfake” or cine-modding a lens. Many people have talked about it before me, but no one explains how to design the ideally sized insert for whatever lens you happen to have.
What are anamorphic inserts?
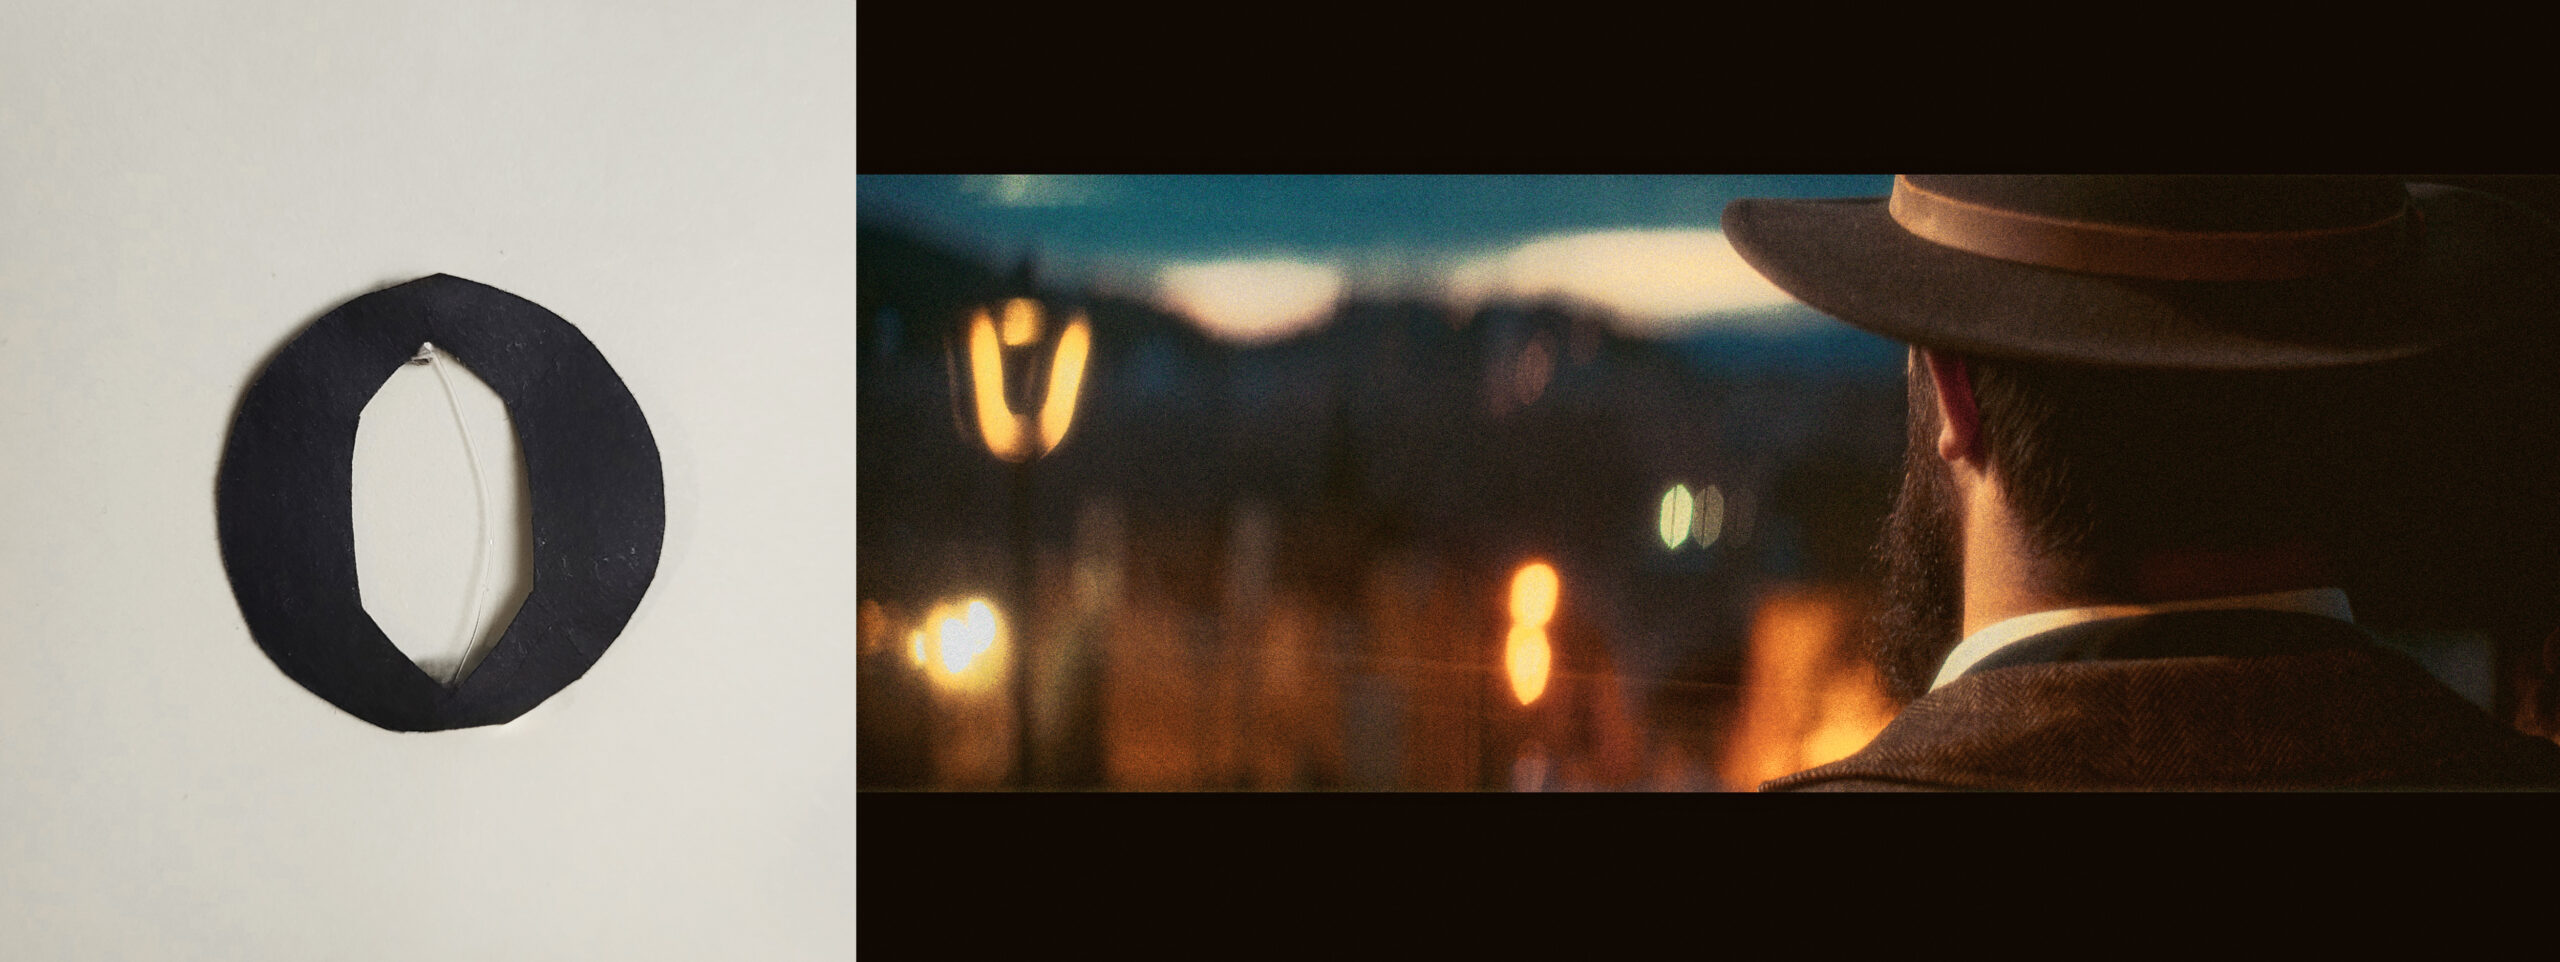
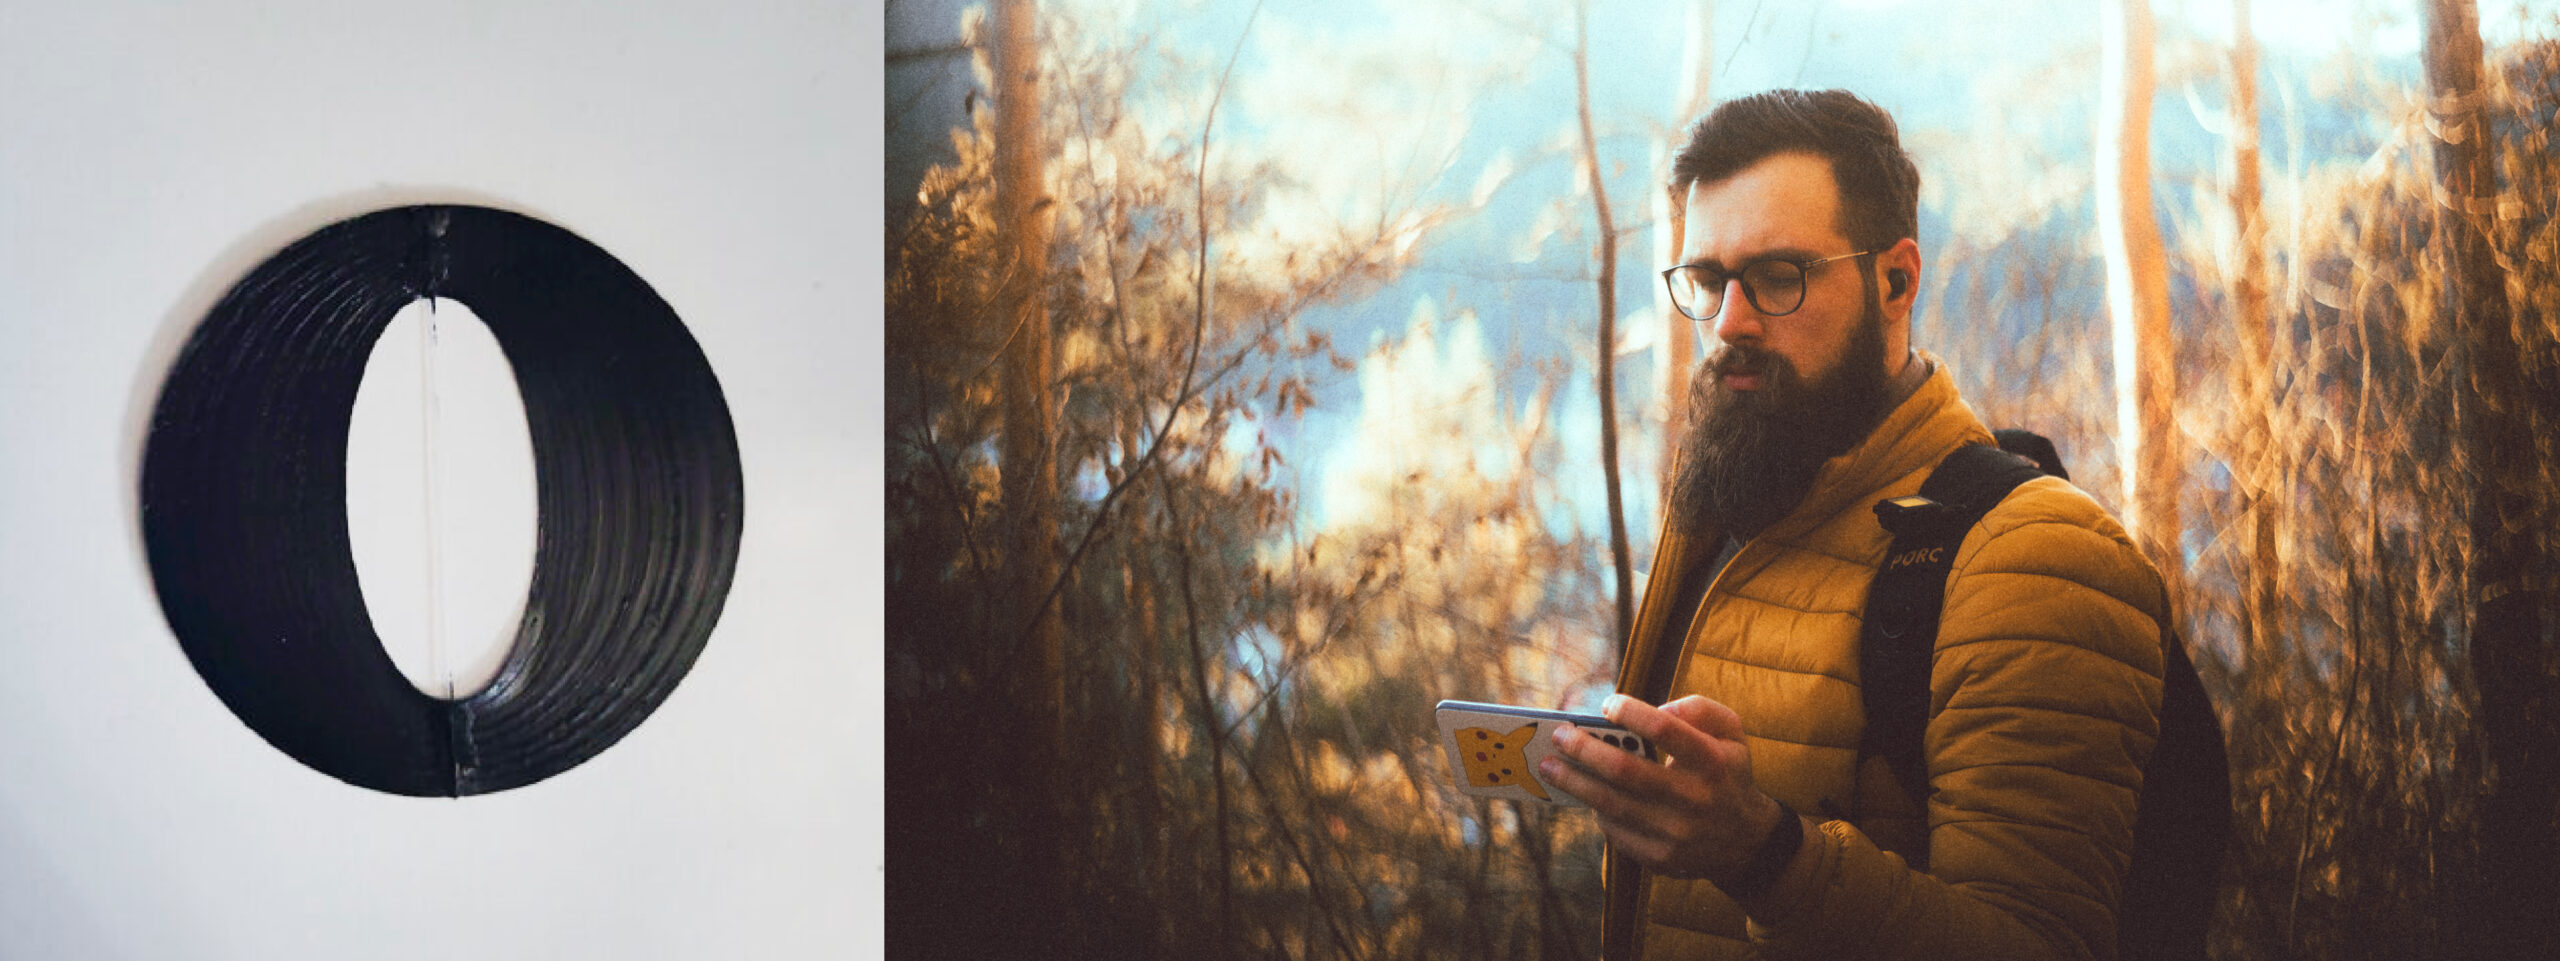
The goal of this mod is to transform the boring old round bokeh balls from your regular photography lenses into more complex ones that enhance the out-of-focus areas of the image. More intriguing and imperfect backgrounds will make your photography stand out while having that signature oval bokeh of an anamorphic lens can help you get more cinematic photos.
It’s easy to think that all you have to do is to put an oval hole in front of the lens like a filter because doing so will result in an oval boke, but with that kind of a solution, you will end up losing a tone of light, might get an ugly vignetting, or even with bokeh that has its corners cut off and looks very sharp, jarring and unpleasant. But if you create a custom one specifically for your lenses you have the ability to tune it to your liking and create a look that better suits your photography style.
PLACEMENT
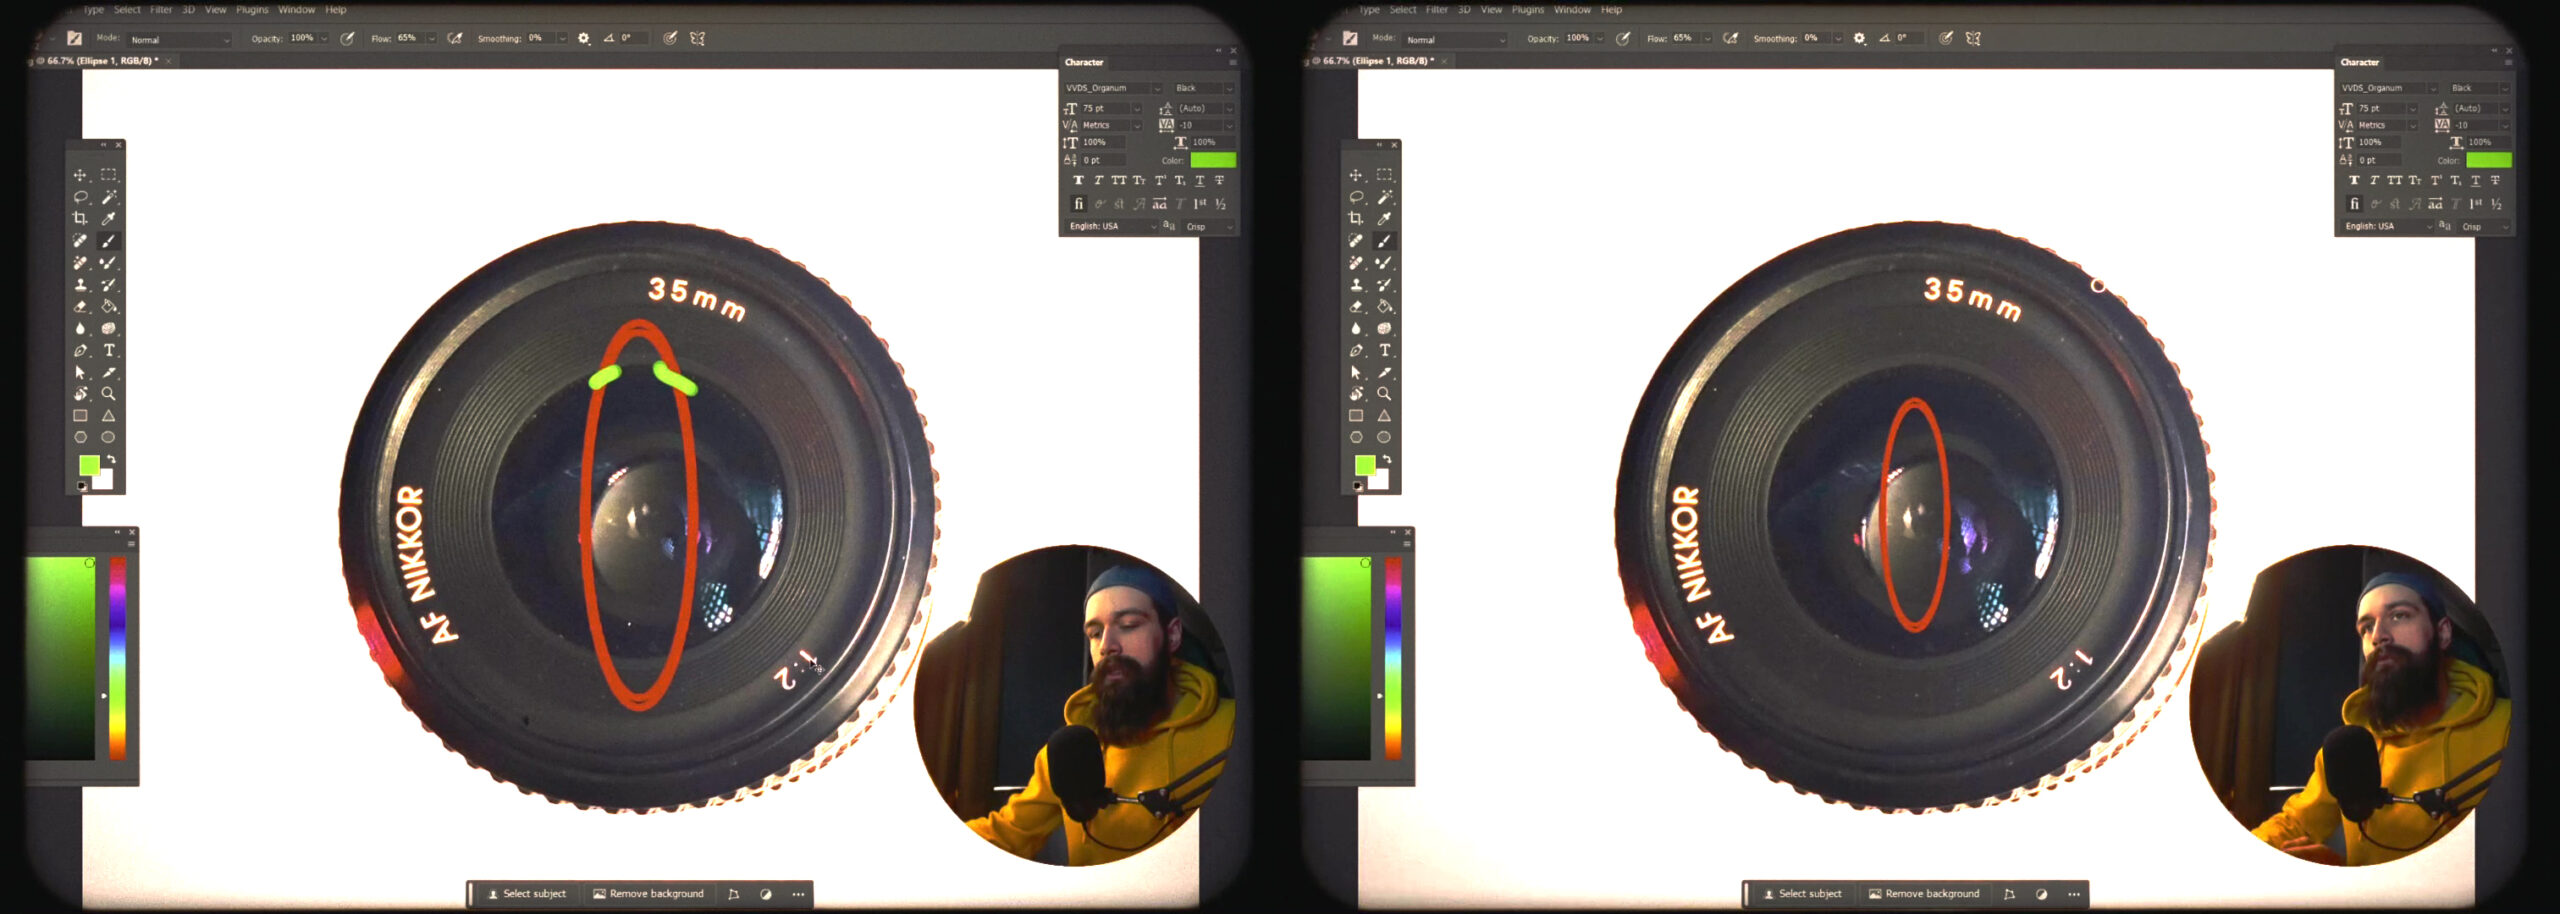
Anamorphic inserts are custom apertures so the logical thing would be to place them in the middle of the lens where you would normally find an aperture. But they can also be placed right against the lens’s frontal or rear element. Doing so and shooting with the lens wide open will produce the desirable look with little to no drawback. This method allows for an easy modification that is fun to try, produces distinctive visual results and it is also easily reversible. Most importantly this will also allow you to try different designs until you find the desired look.
SIZING
My design is easy to tweak and delivers the best results specifically for any of the lenses you already have as long as you are willing to put in some effort. First off you have to measure your lens, and doing so with a pair of calipers is the best approach but be careful not to scratch the glass. If you have a 3d printer you can grab the Fusion 360 file from printables on this link: https://www.printables.com/model/691015-parametric-anamorphic-lens-insert and just enter the parameters to get an exact 3d model, but you can also follow the same design principles with cardboard a ruler and a pair of scissors. Keep in mind, that this mod will work much better on prim lenses than on zooms but you can also make inserts for specific focal lengths on a zoom lens and change them as you go if you are determined to get this special look.
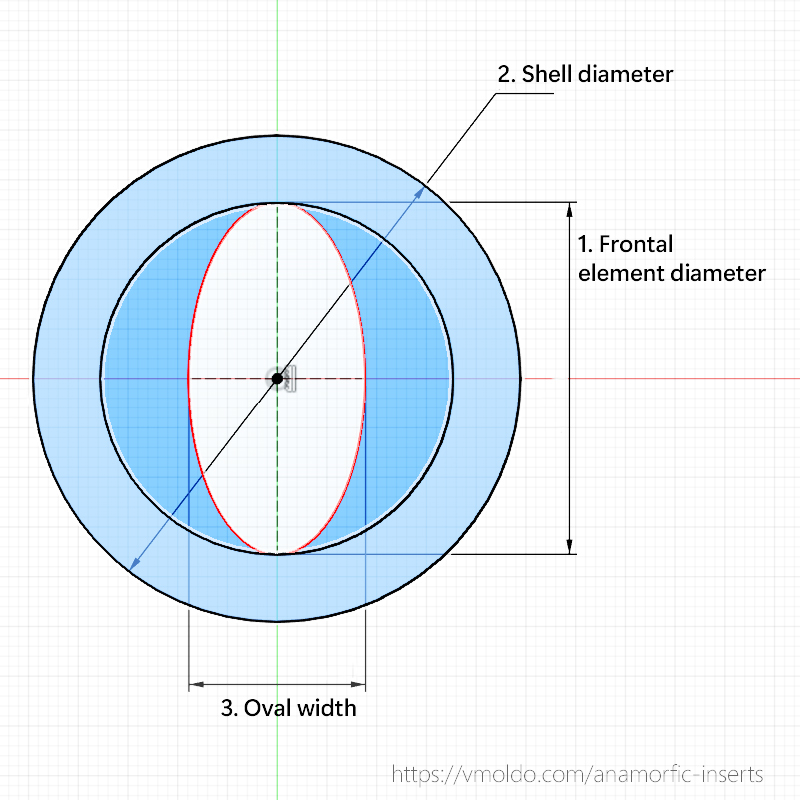
First of all, you need 3 measurements:
- The diameter of the frontal/rear element of the lens that you are going to mod. This will determine the height of your oval cutout. If you make this too tall you will end up with corners that are not going to look appealing. But at the same time, this is still an aperture, and the smaller you make it the less light you will get in your lens. By doing so you will also be messing with the depth of field the same way you would by closing down an aperture so the goal is to make it as close as possible to the size of the glass element.
- Shell diameter. We aim to make the inserts sit flush with the glass element so making them pressure fit against the body of the lens will most probably be the only mounting solution available. Sizing this will require some creativity and will be different for every lens. This parameter will also give you the structural integrity of the anamorphic insert so making it at least 1.5 mm bigger than the previous value is almost mandatory
- The width of the oval cutout is what is going to determine your final look. A good starting point is the value you got at point 1 divided by 2. This will result give you bokhe that is oval but not very distracting. Here the focal length will play a crucial role. If you are trying to mod a 35mm or wider lens you probably can’t go for something narrower but on a 50mm or longer lens you can experiment with narrow apertures and they will produce amazing results.
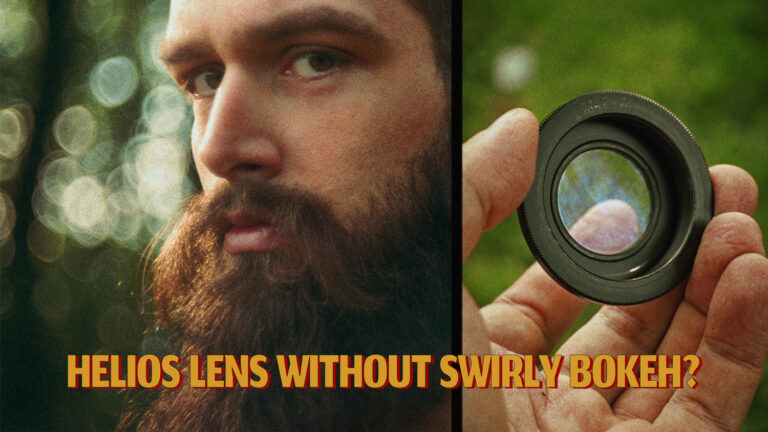
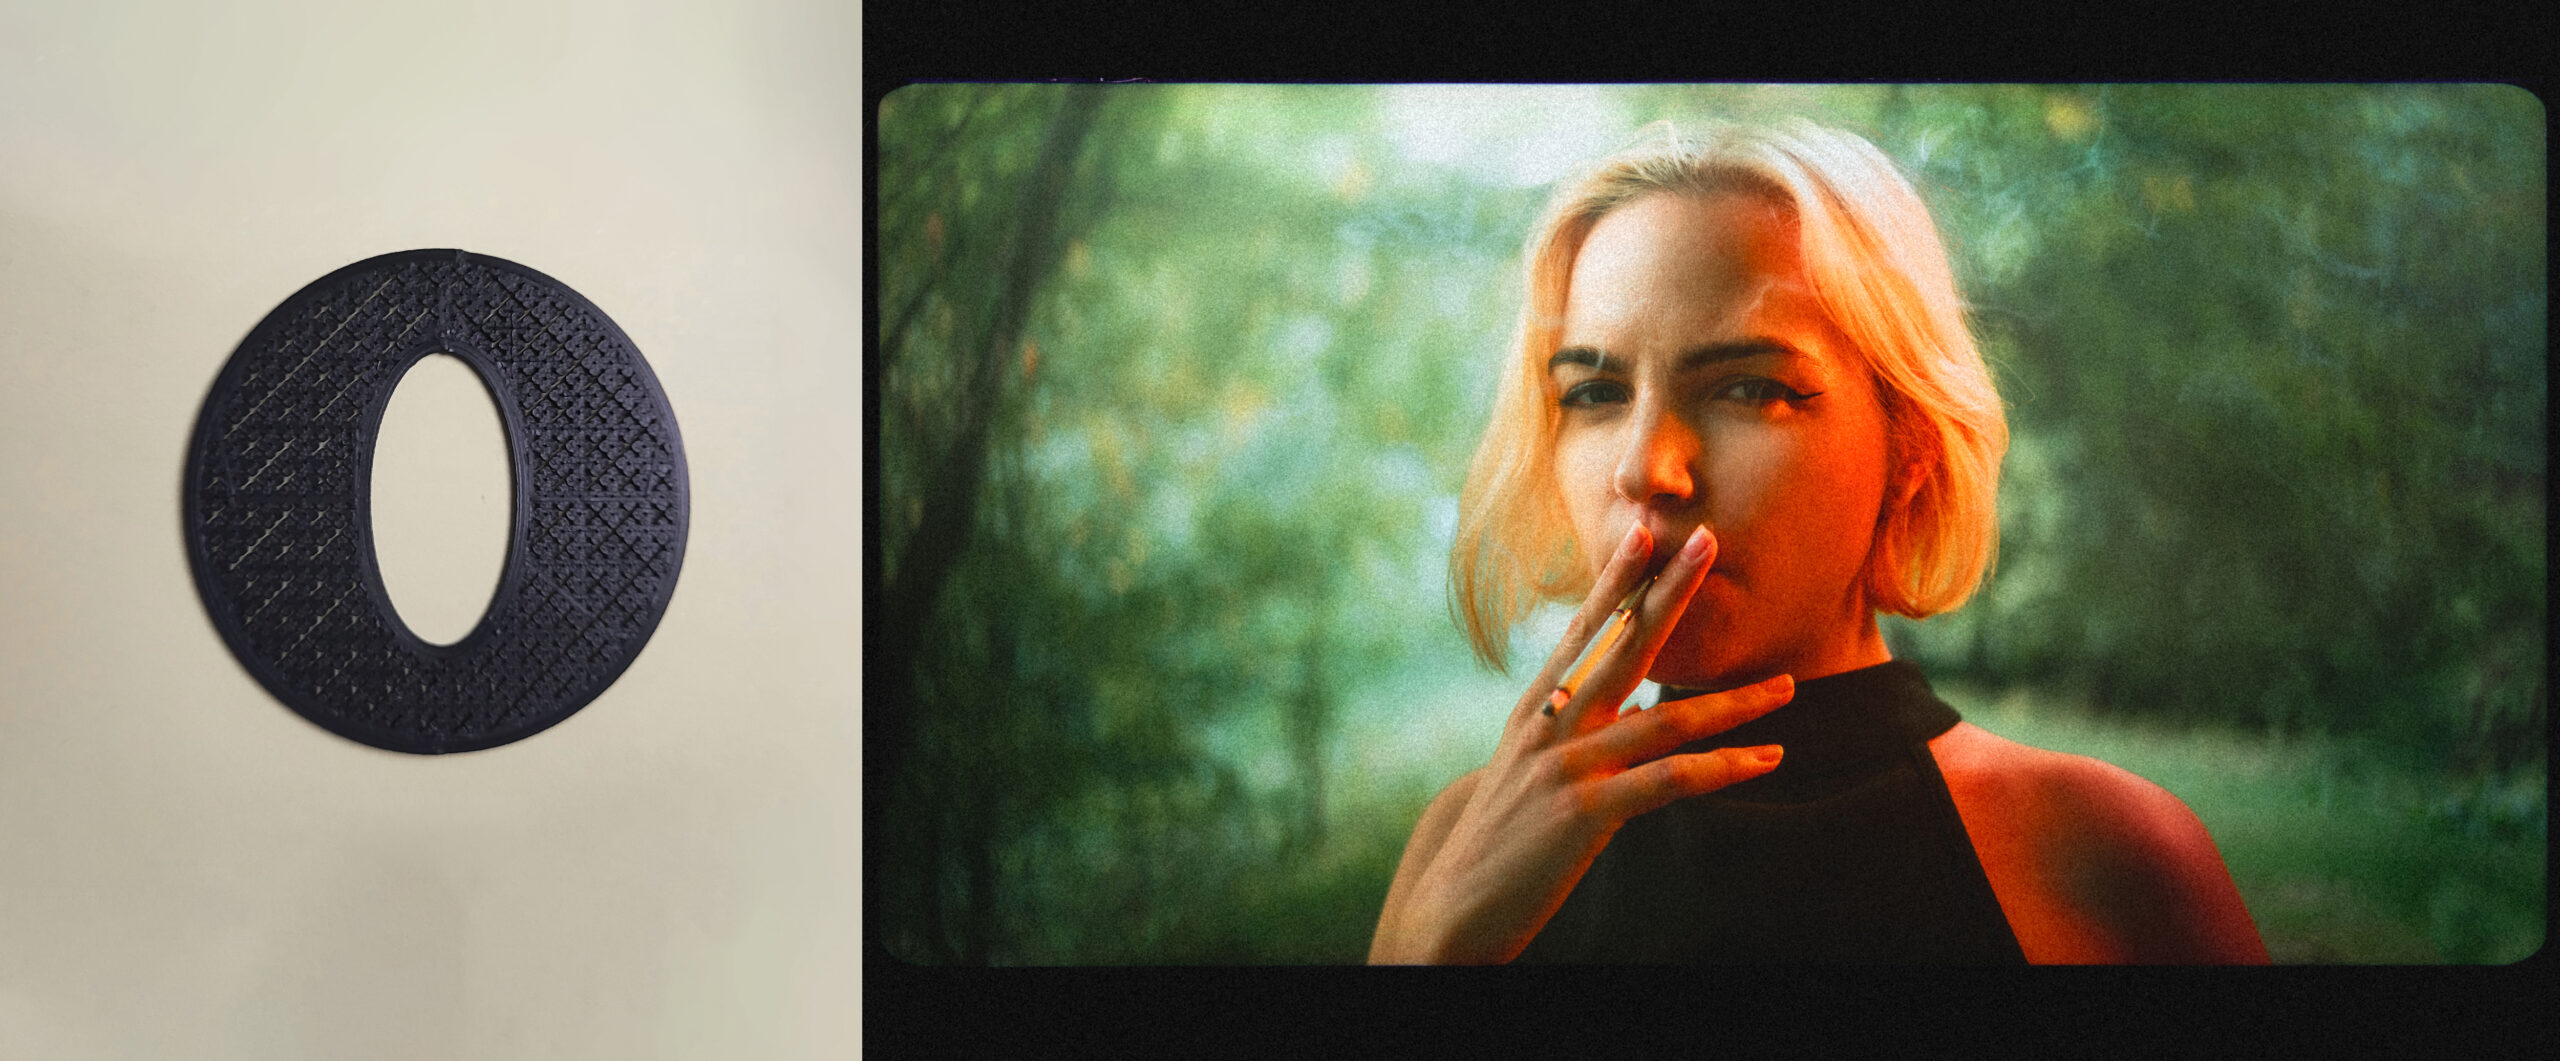
Bonus: By using a width-to-height ratio of 1.33 on an older lens, you can achieve a wonderfully swirling bokeh effect. While I typically prefer narrow apertures with a strong anamorphic quality, this particular look stands out for me when using the 50mm AF Nikon lens, which is practically a permanent fixture in my photography kit.
THICKNESS
At a theoretical level, thicker apertures / anamorphic inserts will produce a loss in sharpness in your images. Still, extra thin prints will be very hard to remove off the print bed and will have 0 structural integrity. Also, I have to say that I didn’t notice a significant sharpness difference between 0.1mm and 2mm disks. I usually aim for a thickness of around 0.33mm (or 2/3 printing layers) This will produce plastic disks that are firm, thin, and a bit flexible.
MATERIAL
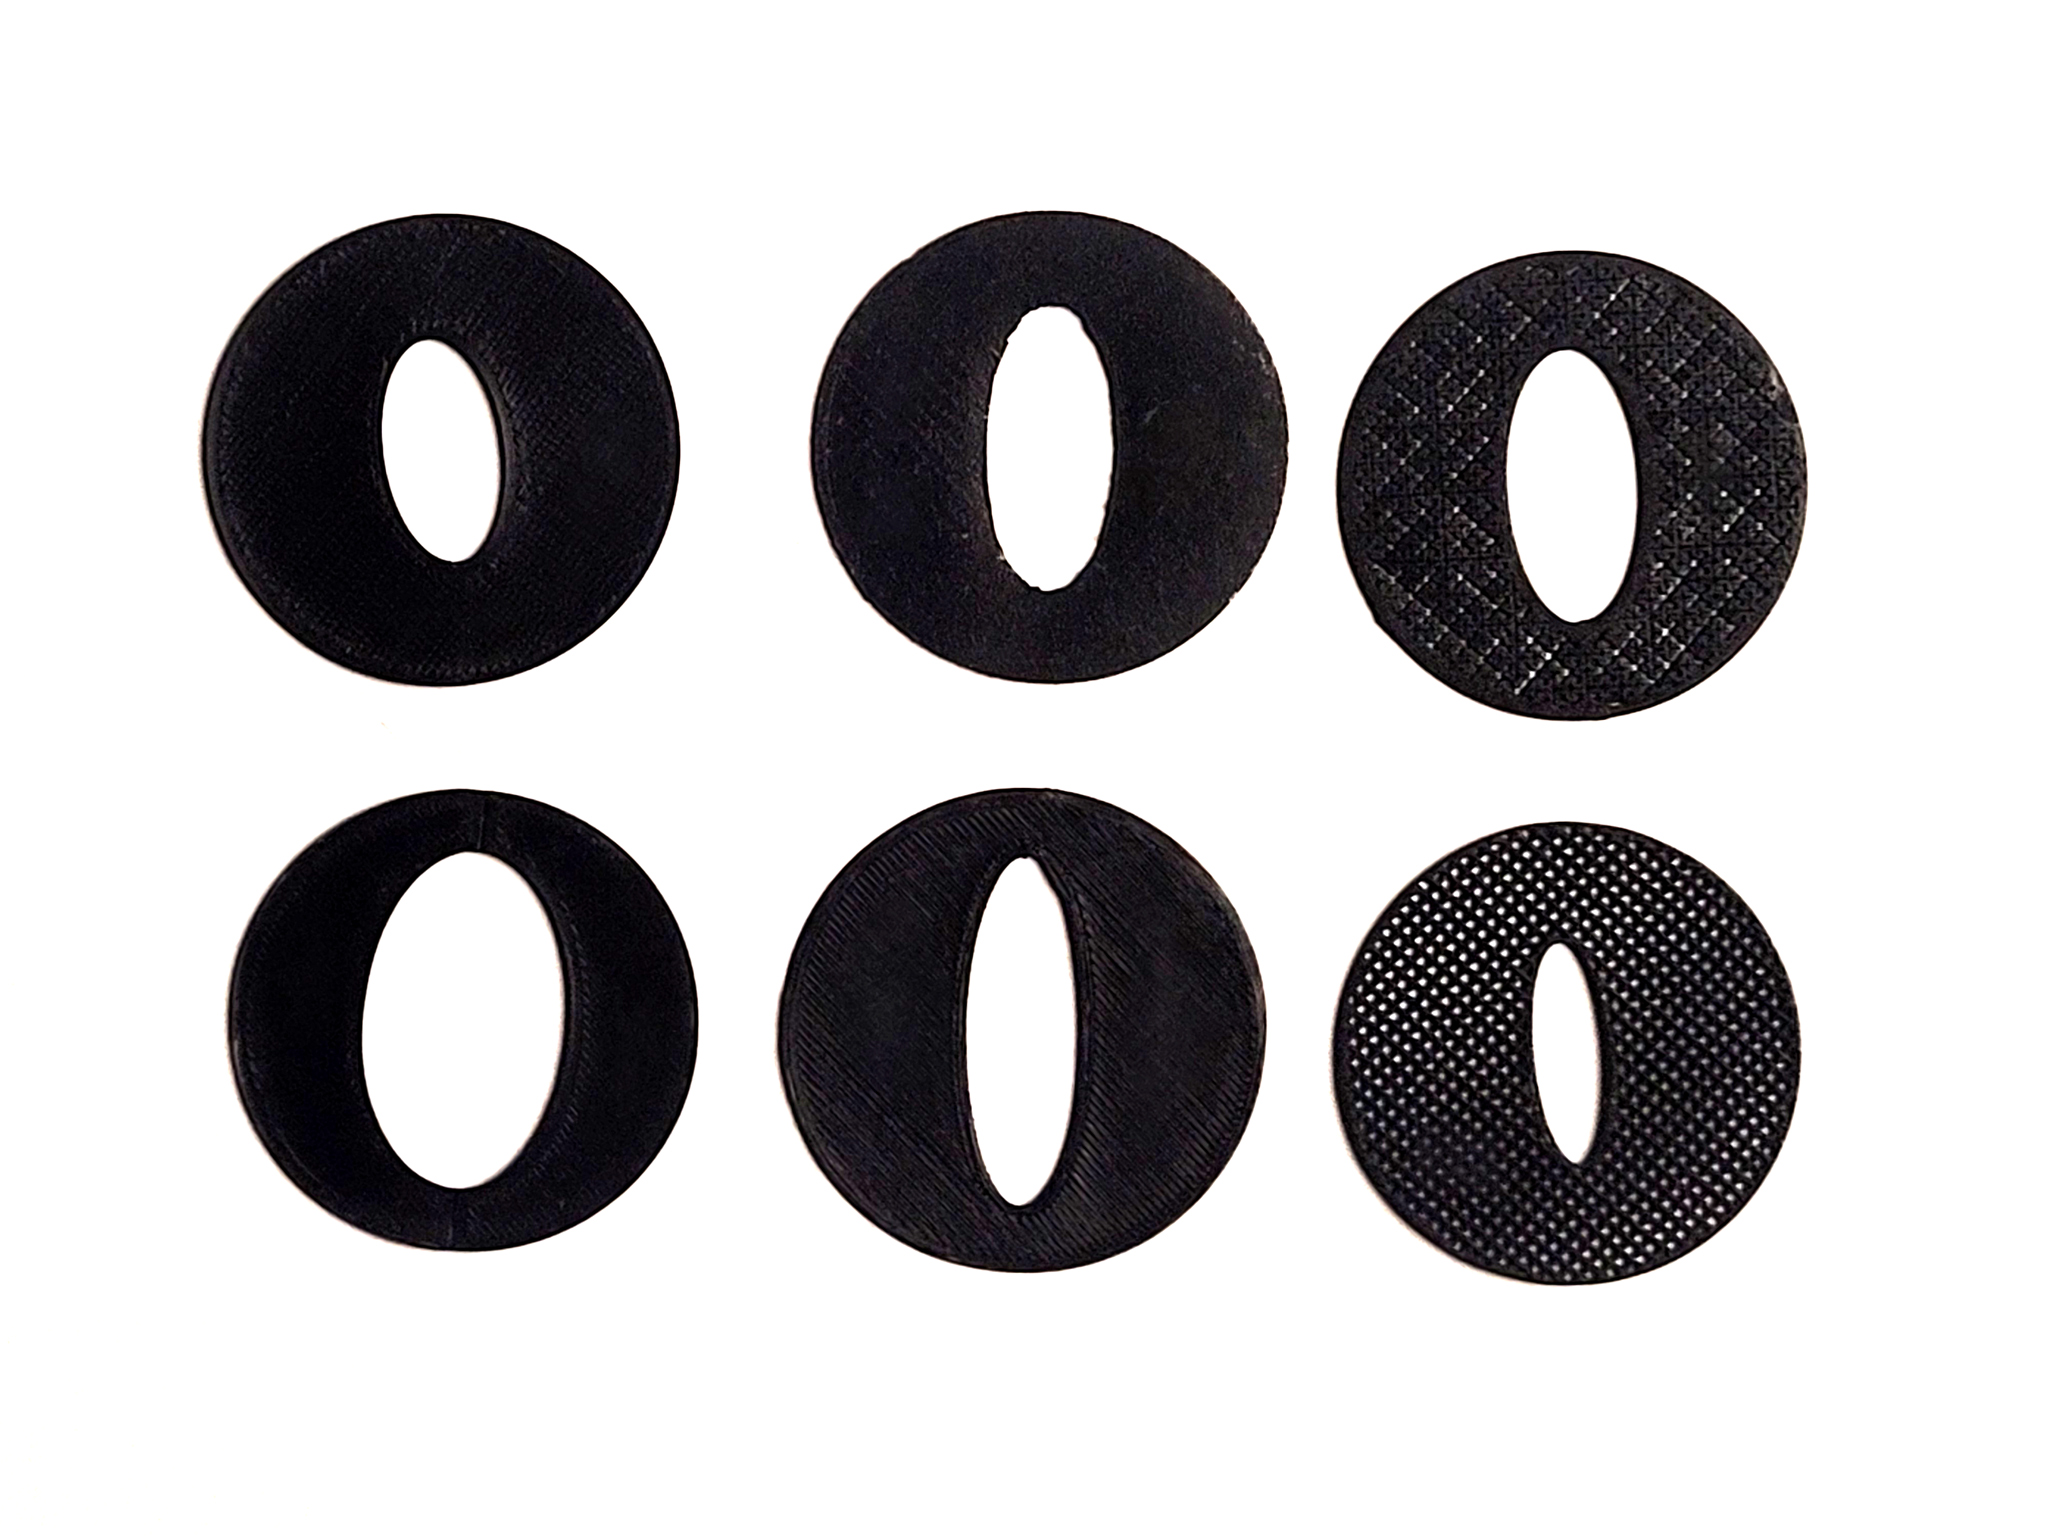
At the end of the day, it doesn’t matter that much what you make your inserters out of. I make mine out of Black PLA+, but as long as the material is soft enough so it won’t damage the lens and it’s not transparent they will work fine. So have fun making them out of plastic, cardboard, or whatever else you have on hand. I am sure someone somewhere has made one of these out of wood or some other crazy material. It’s way more important to opt for black materials. This will help you prevent light from reflecting off the insert which will lead to odd color cast or haziness in your final images.
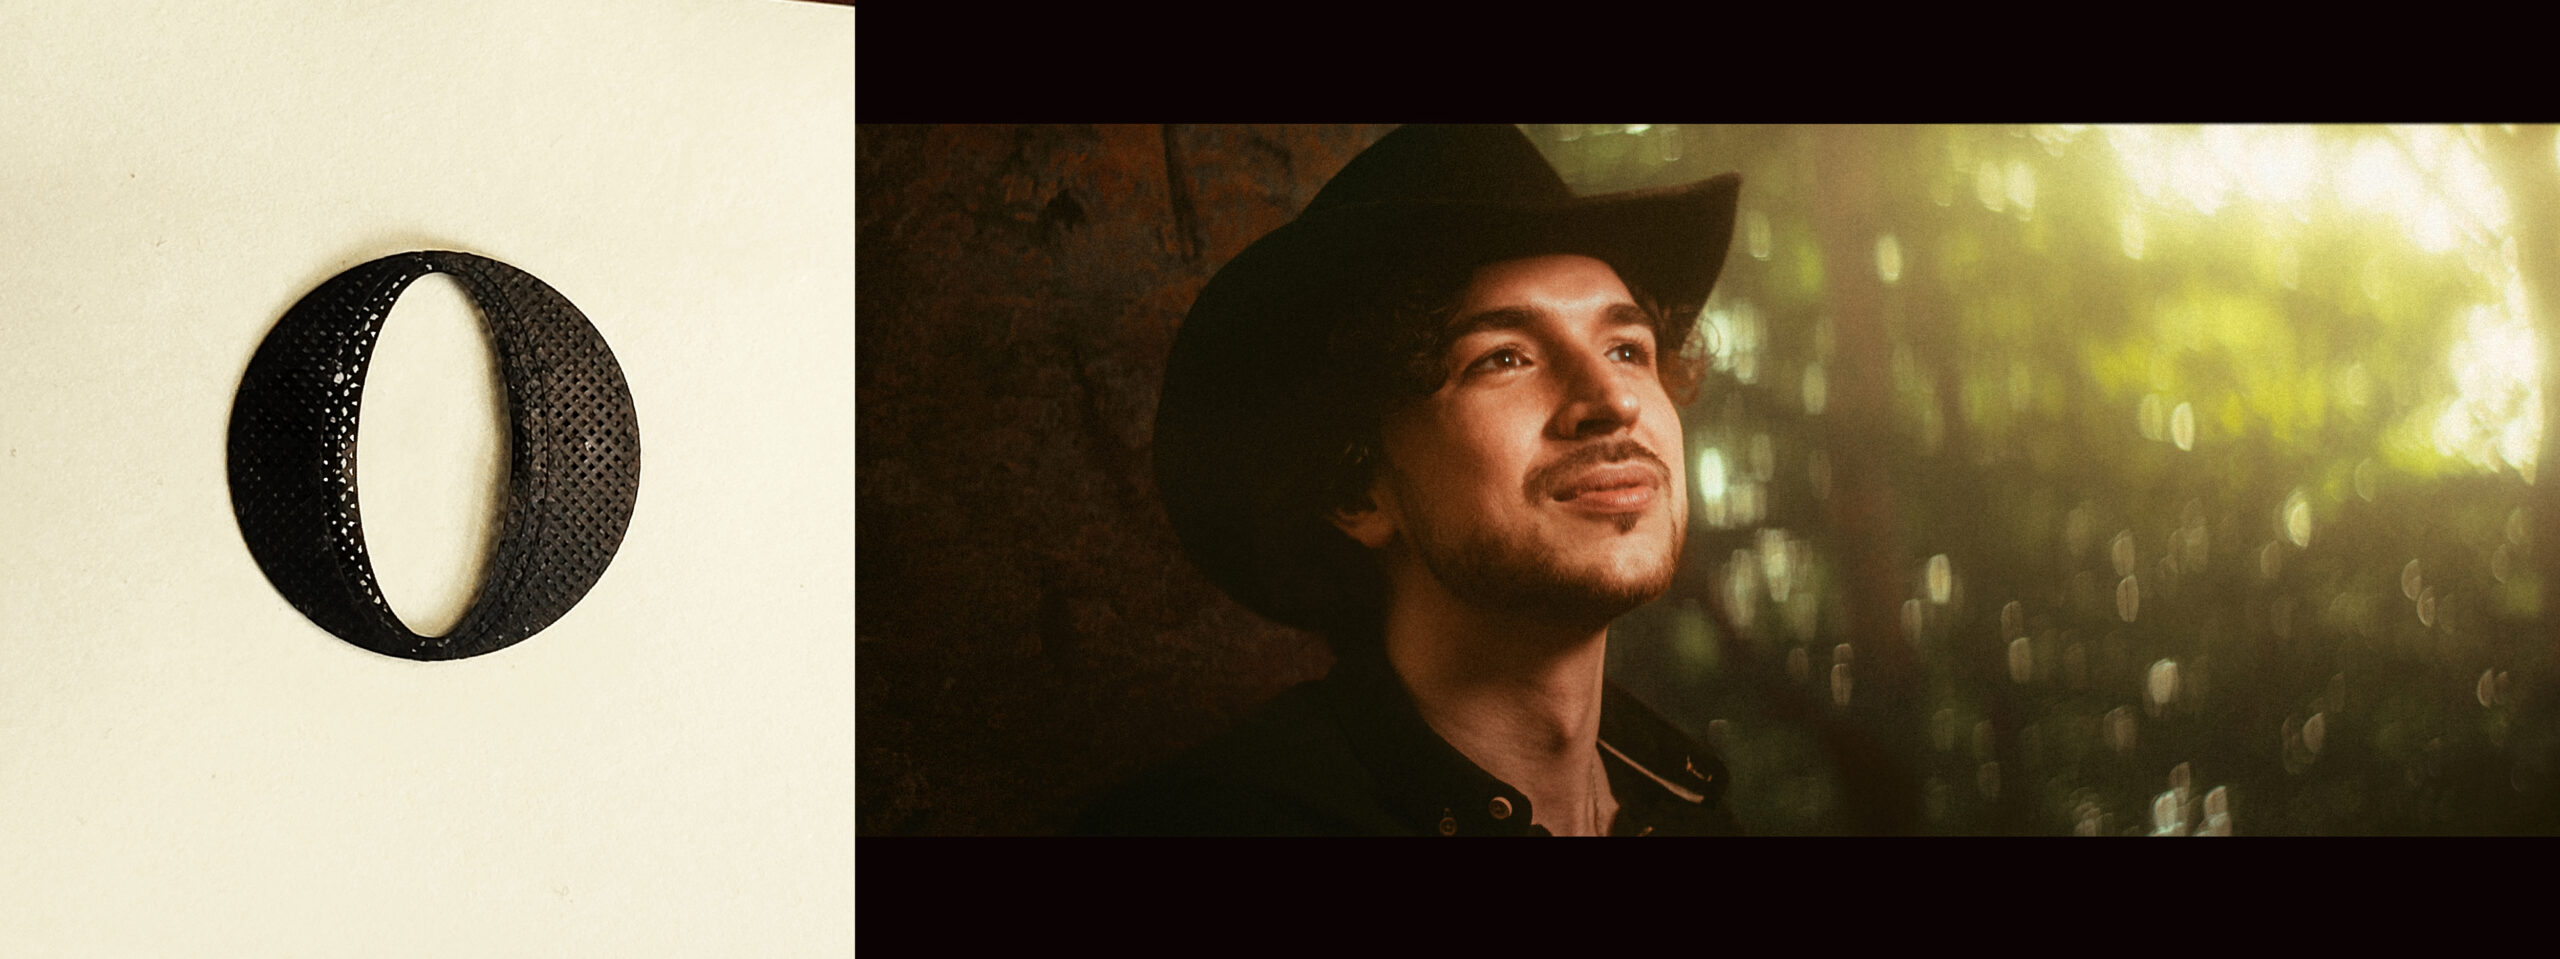
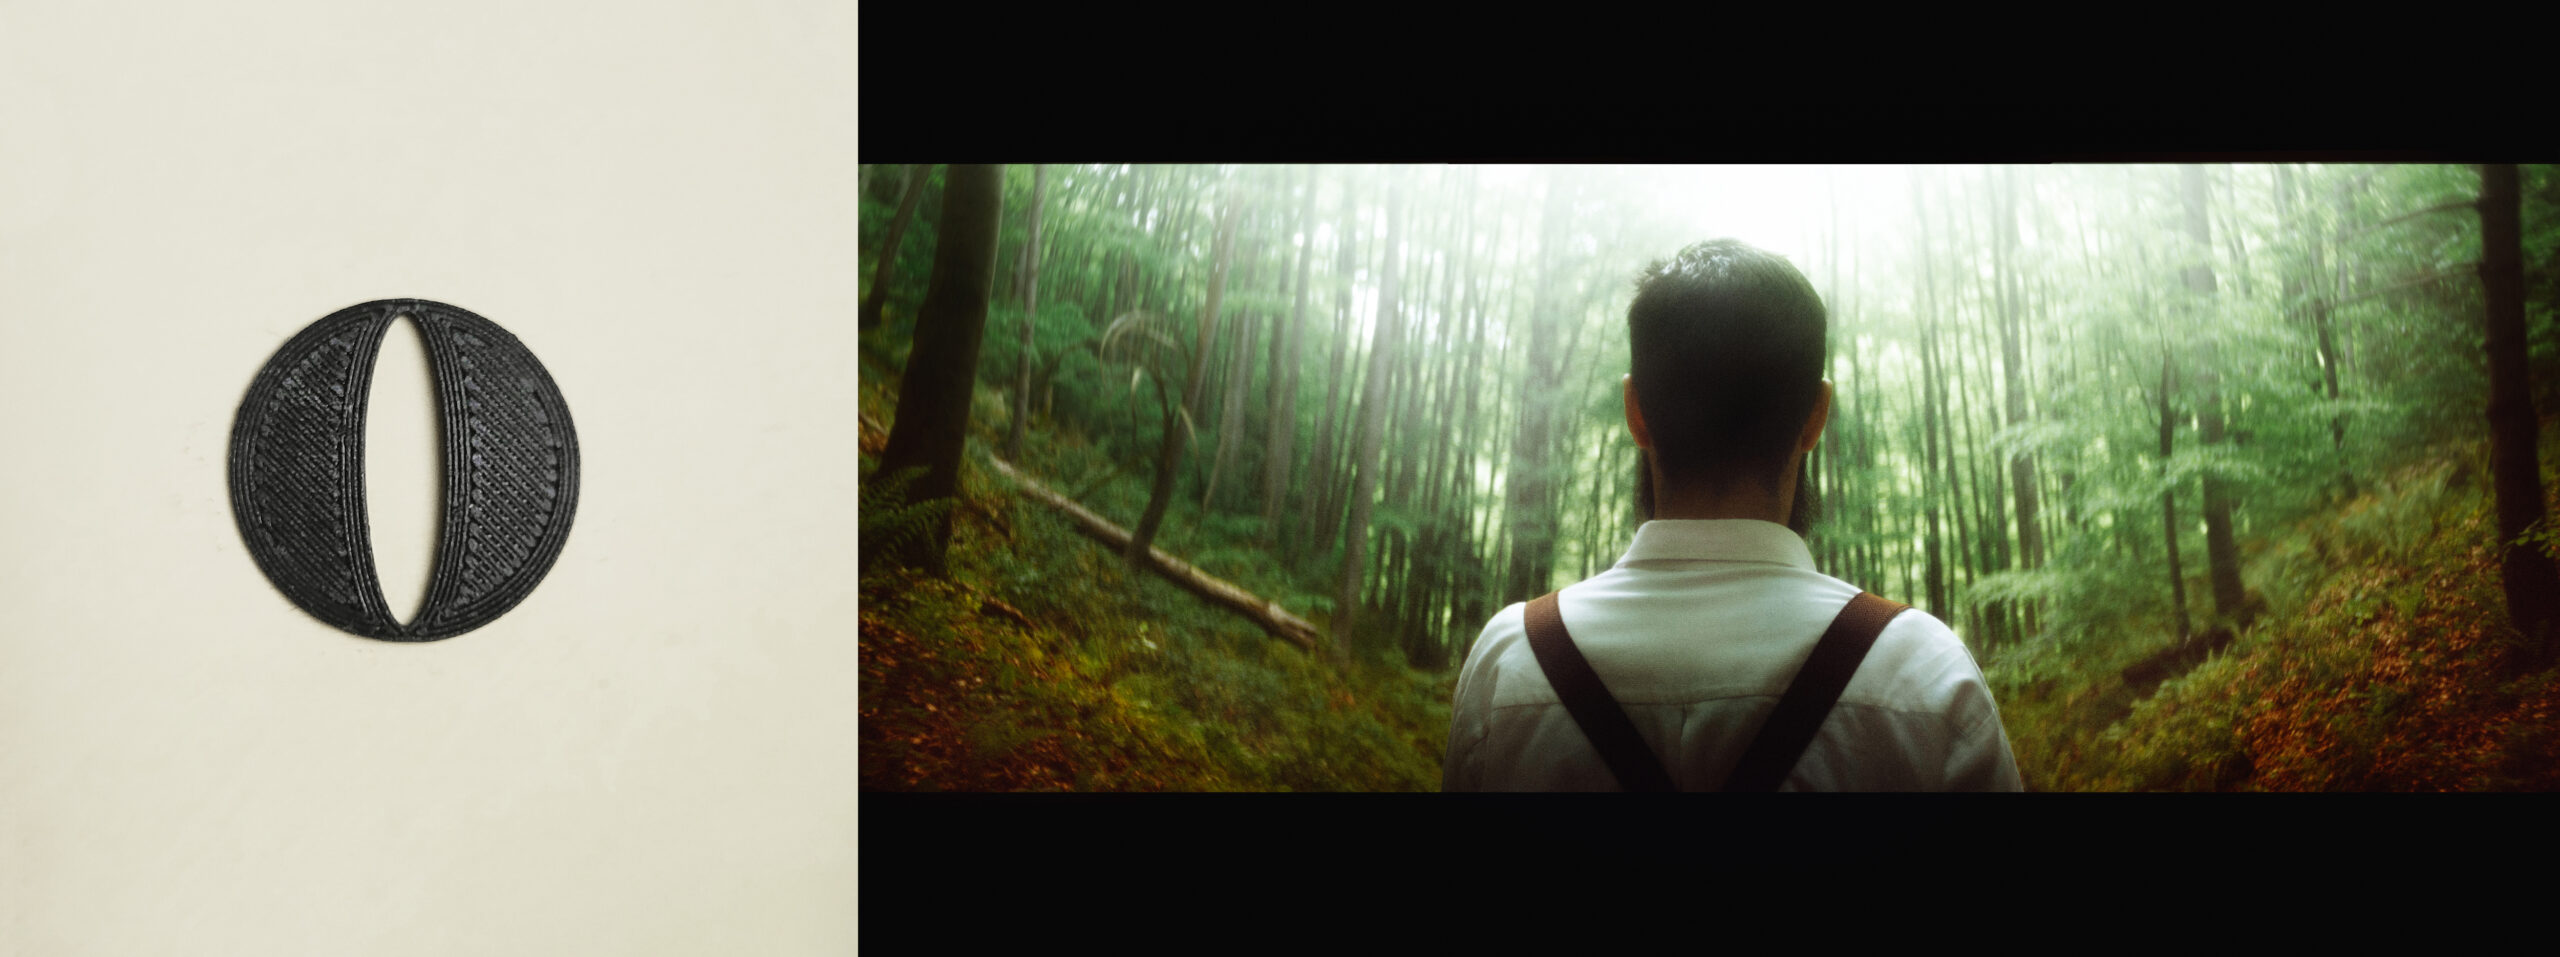
Another interesting idea is to print them with no top/bottom walls so the infill pattern will allow some light to pass through the insert. This will reduce the amount of light you lose and can create weird and interesting patterns in the out-of-focus parts of the photo. It works great with forest photos but won’t produce desirable-looking bokeh balls with stuff like small lights in the distance, it might be worth playing around with this kind of print but it won’t be a top performer.
SECRET SAUCE
My ultimate trick: Inside a slicer like Ultimaker Cura you will find an option called FUZZY SKIN. I like to enable this so my ovals don’t have a perfectly sharp edge. I want bokeh balls that are “imperfect” because our brains are so good at finding repeating patterns in an image and in extreme situations, like portraits against distant city lights a smooth edge will result in sharp-looking ovals that might start to look like CGI. To avoid this I always pair my anamorphic inserts with DIY pro mist filters/fog filters and in editing, I will go for a more vintage look that is completed by a copious amount of grain. So maybe also check out my all-in-one grain for Lightroom here: https://vmoldo.gumroad.com/l/grain if you seek a similar look.