For months now I’ve been obsessed with emulating the film look into my digital photos. It all started with me exploring the panoramic aspect ratio of 65×24 and other wide aspect ratios and trying to understand what makes a photo cinematic. As part of this journey I’ve also started to research grain, how is it formed, and how it looks on different film stocks, and, truth be told, I was not ready for how deep this rabbit hole is.
In order to recreate grain well in our digital photos we first have to understand what grain is. On film, the images are composed of grain. Be it silver halides or dye granules, they are organic shapes that are distributed unevenly in an emulsion and when exposed to light they create the image you finally see.
Now let’s try an understand what this means for us, digital shooters
The fact that images are composed of grain means that the grain should be the smallest detail in the image. So all those megapixels you paid a lot of money for are kind of working against you right now. The bigger the ISO of the film you want to emulate the bigger the crystals would be. Big crystals mean a lower level of detail. So when reverse engineering this for digital, you will have to either lower the resolution or the sharpness of your images. The easy route is a gaussian blur on the entire photo, but if your goal is film emulation you are already looking into mist/haze filters and other ways to do this in camera. Regardless of the method, you pick for lowering the sharpness, you are aiming to have small details of the image (like hair) as thin as the grain particles. Basically to goal is to have the pixels match the size of the grain.
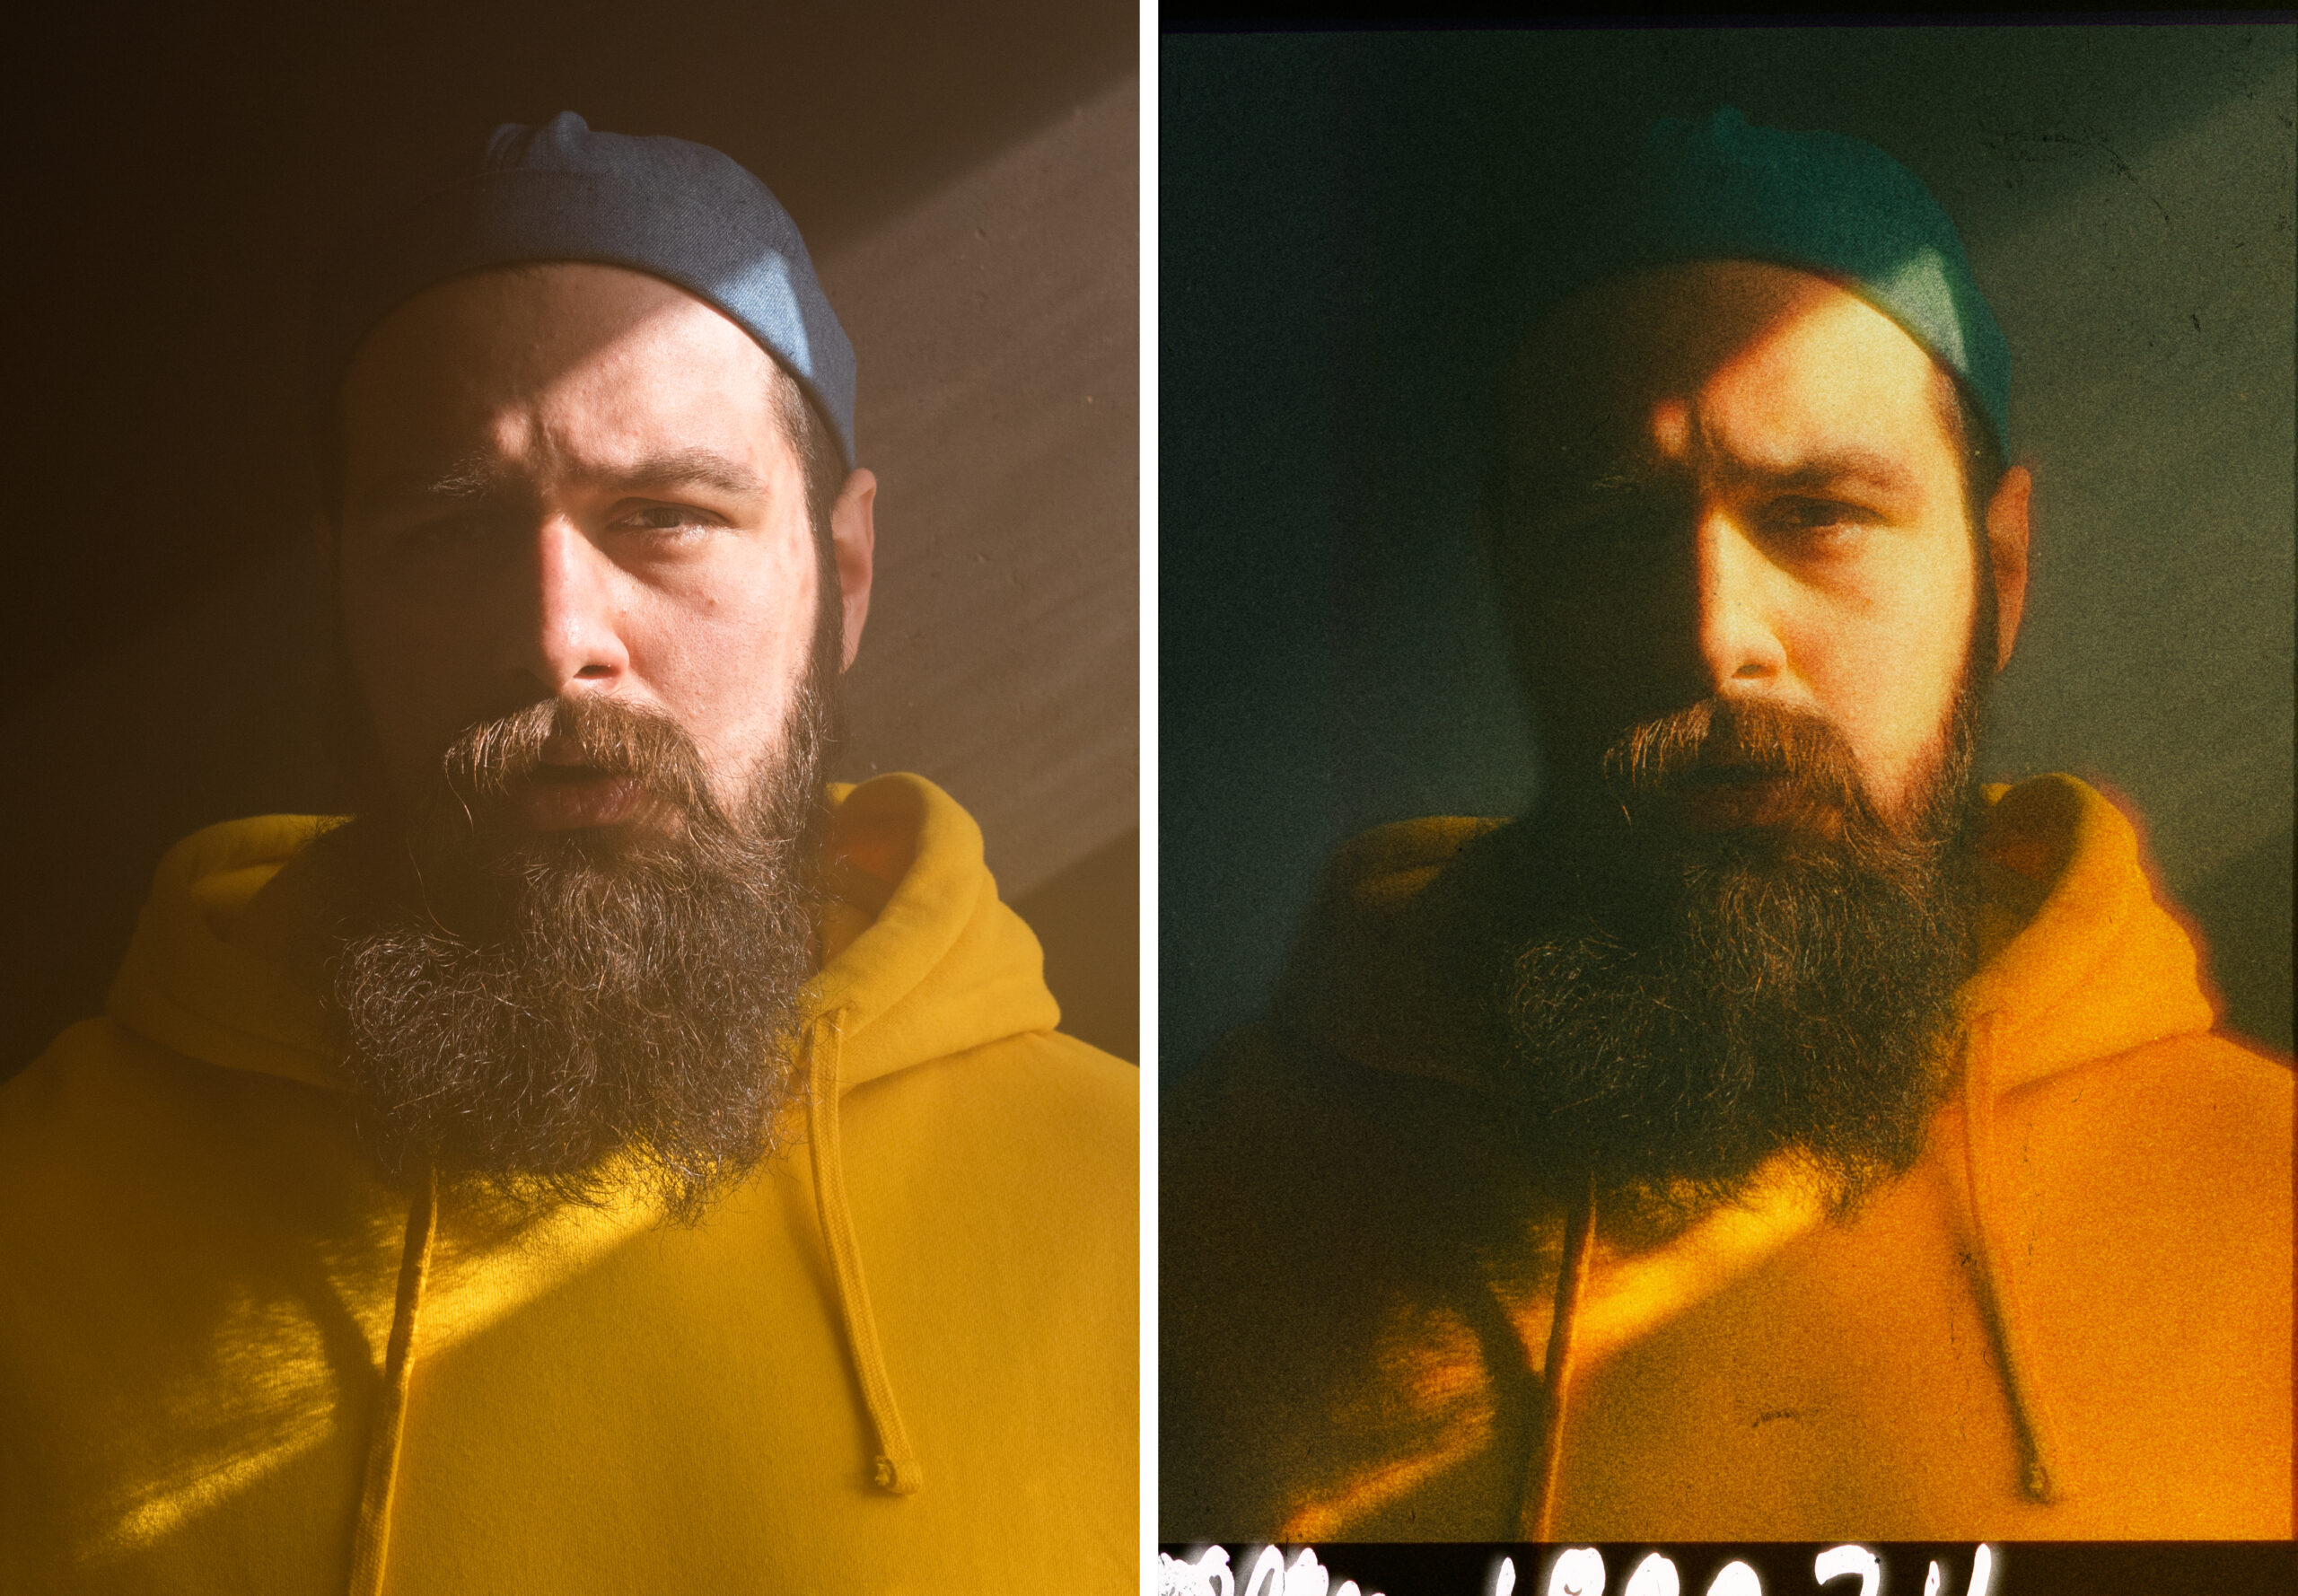
Another very important is the fact that the film grain is made out of organic particles. That means not all the grain particles have the same size and they are unevenly in the emulsion. This is the most significant distinction between grain and noise. Noise, by nature, is digital so it is all square-shaped, like a pixel, and it’s uniform in nature because pixels are just a grid of little, tiny squares. So when you look very closely you can easily tell that noise and grain are two very different things with grain achieving actual randomness of size and positioning while noise is just a table of black, white, and grey squares. That’s why you should never use a noise overlay layer on top of a photo in order to emulate the grain.

One more aspect that we should keep in mind is that the color film grain is made of dye particles as well. So just overlaying black and white grain on top of a digital photo will not be enough for a good grain emulation. Also if you are adding the grain after your colo grade you should make sure your grain has a similar color treatment to your shots.
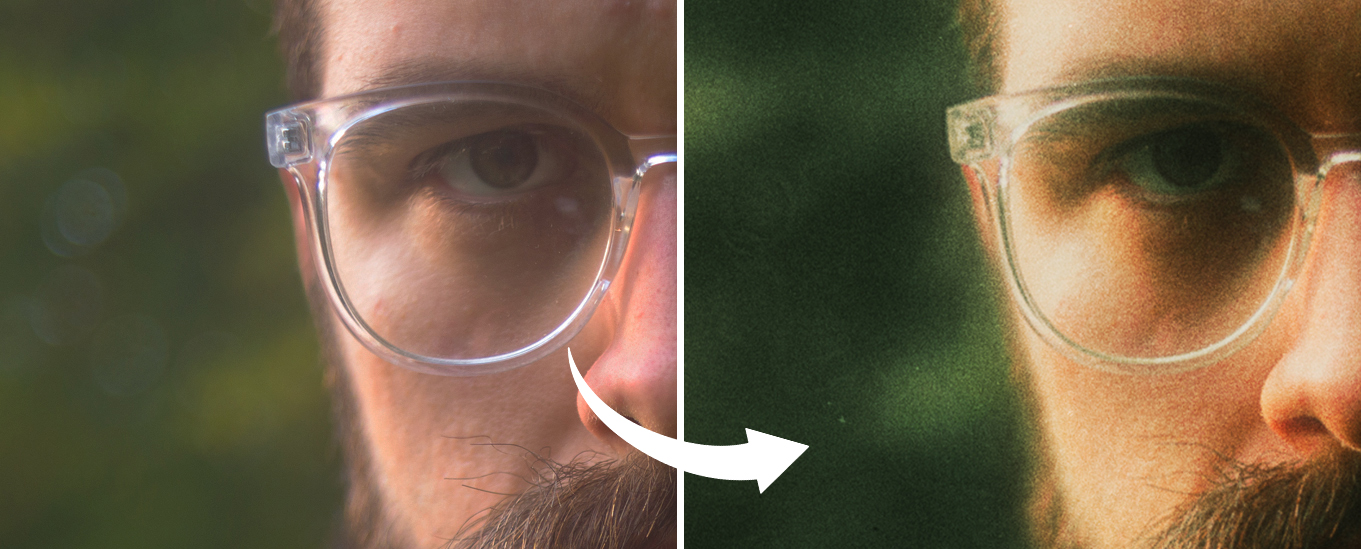
A final note deriving from the fact that the film image is composed of particles. Due to the way we perceive images, there seems to be a lot less grain in highlights and deep shadows but since particles are what the image is composed of there can never be no grain at all in any part of the image. This matter because if you just take a grey overlay and blend it with Soft light or Overlay blending mode on top of your photo you will end up with perfectly clean areas near the end of the spectrum. Underneath you can see how a scanned grain overlay looks on a black-to-white gradient with different blend modes. For me, Hard Light blending mode seems to be the closest one for shadows and highlights but at the same time in the mid-tones, it’s a bit too harsh for my taste so further tweaking will be needed.

Now to be perfectly honest, going into this I was expecting the answer to be something like don’t add noise, and if you want to generate some grain, make sure you have multiple layers so not all particles will be the same size. Or even better, use scanned grain from actual film stock, But reading more about it made me realize that in order to get a believable result it’s not enough to discuss what overlay is the best to slap on top of a photo after you finished editing everything else.
There are an infinite number of ways to add grain, and with the current resurgence of the film look, I’m sure a few more will pop up as well. And at the moment some of the most believable results seem to come from phone apps or plugins, but this poses 2 problems for me and my workflow. First of all, I hate slingshotting files back and forth to my phones, that means saving stuff to jpeg again and again, and the quality will drop (probably not enough to be noticeable). And more importantly, I like my workflow to be non-destructive so I can go in and adjust things on the fly a few days later and this can only be achieved with layers in Photoshop at the moment.
After all the research, I’ve done in the last few days I can’t give you a simple 1 click solution to this problem if your goal is to have credible film emulation, but a list of pointers that will help you develop your own method and bake it into your professional workflow.
- use scanned overlays instead of generated noise
- lower the quality of your photo so you don’t have smaller details than the particles
- color grade after you added the grain
- have different amounts of grain in shadows, mid-tones, and highlights
- and as always take a step back and look at your images as a whole, don’t just add grain to everything
At the end of the day, I do think it depends on how you are going to display your work and how much time you have to invest into making your digital files look as close to analog as possible. You can use the Lightroom sliders or a phone app and call it a day for a quick social media post because the compression will ruin the look anyway but when going for a big art print or using the image for an ad campaign quality matters and the devil is always in the details.
LATER EDIT
As a quick update. Since I wrote this article Adobe has updated Lightroom and now we have the possibility to add different amounts of grain to different parts of the images with masking. I’ve also made a set of presets that emulate The natural behavior of grain on film for a quick and easy way to add better grain without having to leave Lightroom.